Create a multi-zone universe with Kubernetes
YugabyteDB Anywhere allows you to create a universe in one geographic region across multiple availability zones using Kubernetes as a cloud provider.
Prerequisites
Before you start creating a universe, ensure that you performed steps described in Configure the Kubernetes cloud provider. The following illustration shows the Managed Kubernetes Service configs list that you should be able to see if you use YugabyteDB Anywhere to navigate to Configs > Cloud Provider Configuration > Infrastructure > Managed Kubernetes Service:

Note that the cloud provider example used in this document has a cluster-level admin access.
Create a universe
If no universes have been created yet, the Dashboard does not display any.
To start, click Create Universe and complete the first two fields of the Cloud Configuration section:
-
In the Name field, enter the name for the YugabyteDB universe (for example, yb-k8s).
-
Use the Provider field to select the appropriate Kubernetes cloud (for example, K8s Provider). Notice that additional fields appear.
Complete the rest of the Cloud Configuration section as follows:
-
Use the Region field to select the region. This enables the Availability Zones option that allows you to see zones belonging to that region.
-
Provide the value in the Nodes field. This value should be equal to or greater than the replication factor. The default value is 3. When this value is supplied, the nodes are automatically placed across all the availability zones to guarantee the maximum availability.
-
In the Replication Factor field, define the replication factor, as per the following illustration:

Complete the Instance Configuration section as follows:
- Use the Instance Type field to select the CPU and memory combination, as per needs to allocate the YB-TServer nodes. The default is small. You can override this setting when you configure the Kubernetes cloud provider (see Configuring the region and zones).
- In the Volume Info field, specify the number of volumes multiplied by size. The default is 1 x 100GB.
- Select Enable YSQL to enable the YSQL API endpoint to run Postgres-compatible workloads. This setting is enabled by default.
- Select Enable YEDIS to enable the YEDIS API endpoint to run Redis-compatible workloads. This setting is disabled by default.
- Select Enable Node-to-Node TLS to enable encryption-in-transit for communication between the database servers. This setting is enabled by default.
- Select Enable Client-to-Node TLS to enable encryption-in-transit for communication between clients and the database servers. This setting is enabled by default.
- Select Enable Encryption at Rest to enable encryption for data stored on the tablet servers. This setting is disabled by default.
Complete the Advanced section as follows:
- In the DB Version field, specify the YugabyteDB version. The default is either the same as the YugabyteDB Anywhere version or the latest YugabyteDB version available for YugabyteDB Anywhere.
Complete the G-Flags section as follows:
-
Click Add Flags > Add to Master to specify YugabyteDB Masters parameters, one parameter per field.
-
Click Add Flags > Add to T-Server to specify the YugabyteDB T-Servers parameters, one parameter per field.
For details, see the following:
Accept default values for all of the remaining fields.
The final step is to click Create and wait for the YugabyteDB cluster to appear.
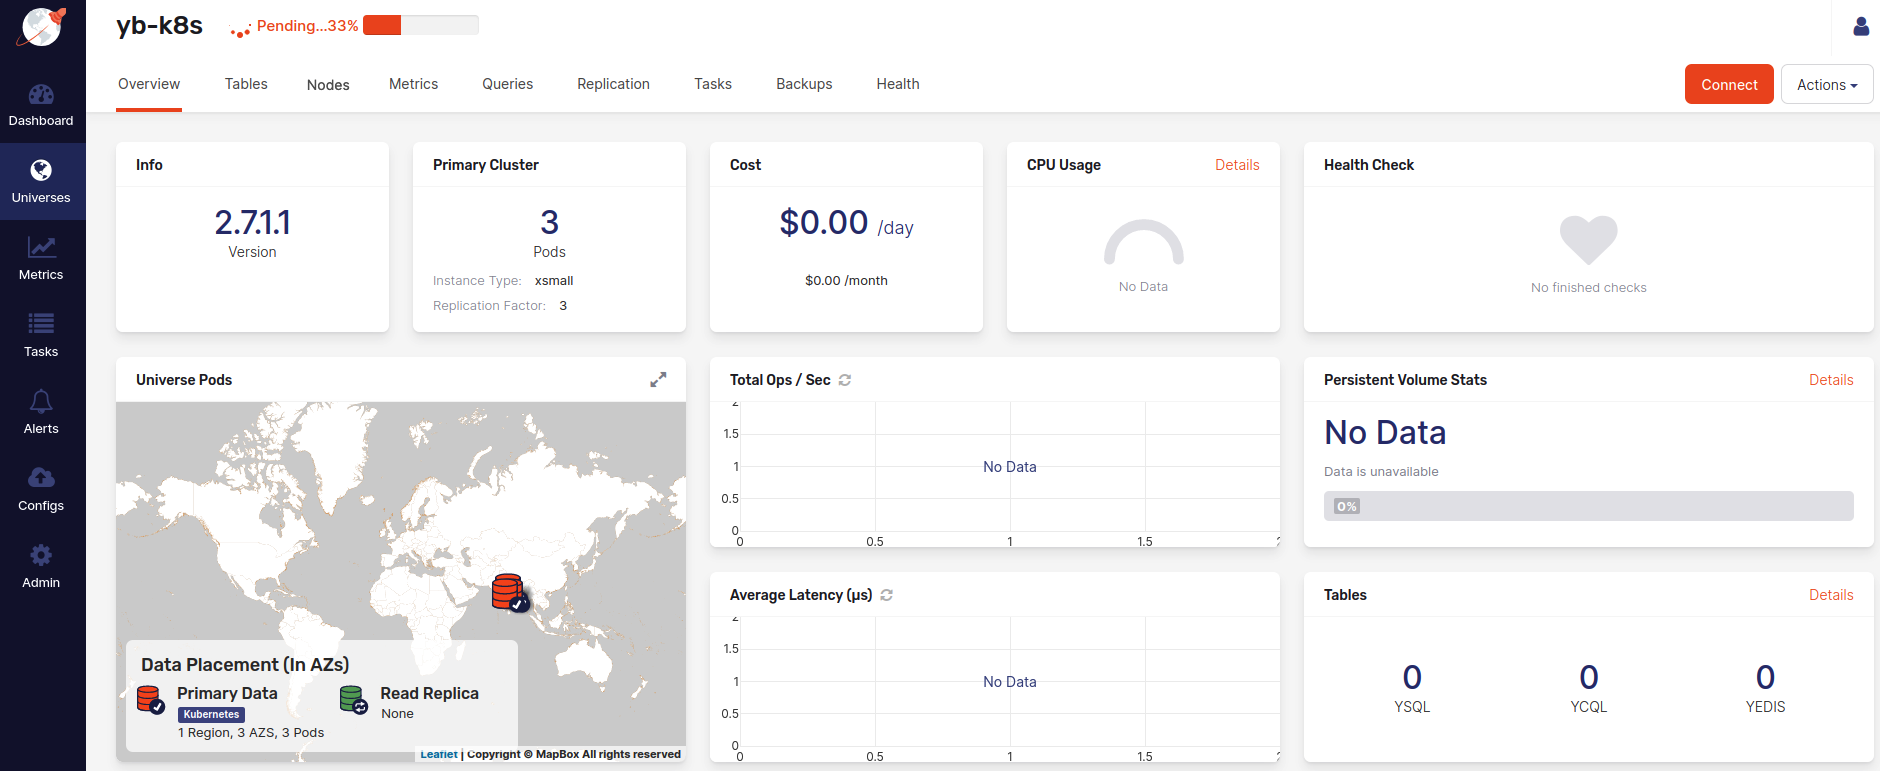
The following illustration shows the universe in its pending state:
Examine the universe and connect to nodes
The universe view consists of several tabs that provide different information about this universe.
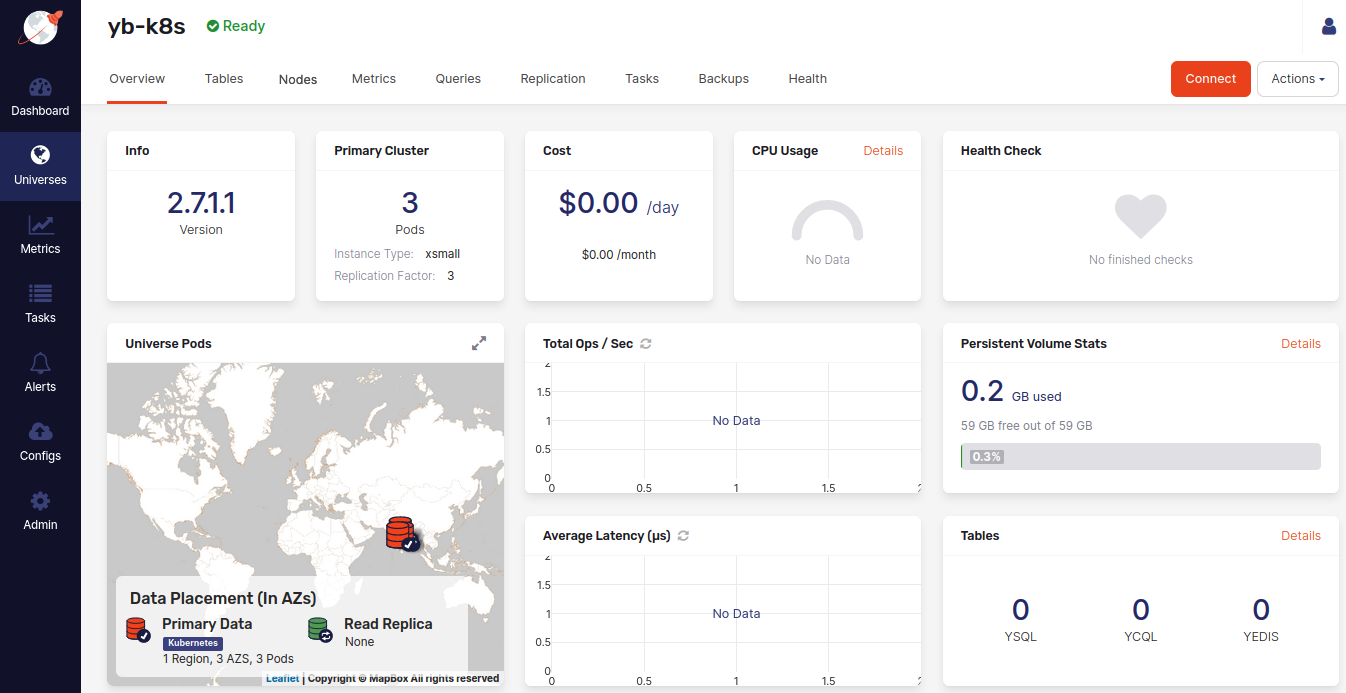
The following illustration shows the Overview tab of a newly-created universe:
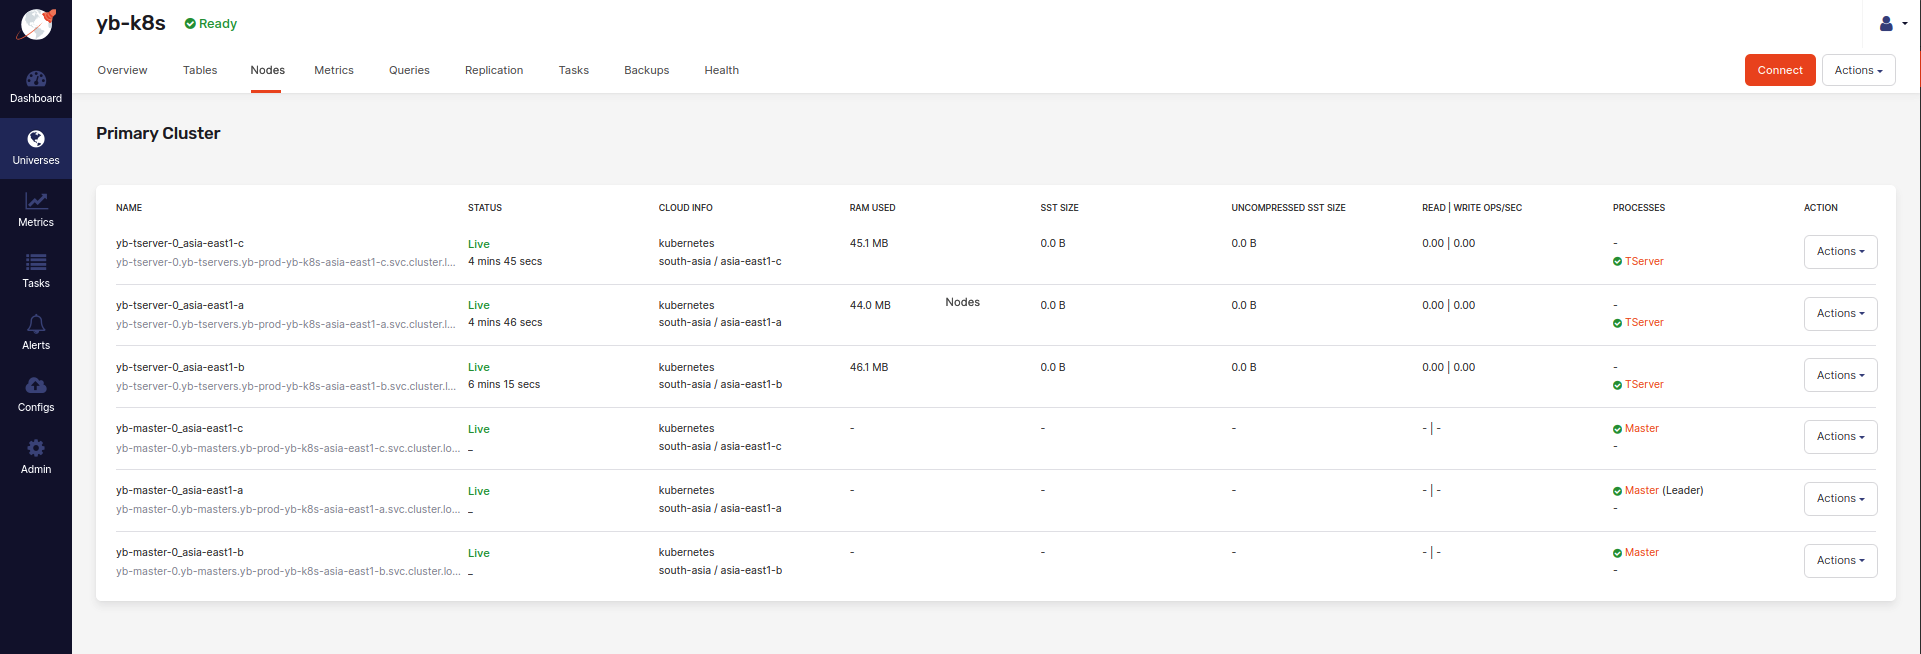
The following illustration shows the Nodes tab that allows you to see a list of nodes with their addresses:
You can create a connection to a node as follows:
-
Click Connect to access the information about the universe's endpoints to which to connect.
-
On a specific node, click Actions > Connect to access the
kubectlcommands that you need to copy and use to connect to the node.
Connect to the universe
For information on how to connect to the universe from the Kubernetes cluster, as well as remotely, see Connecting YugabyteDB clusters.