Create a multi-region universe
YugabyteDB Anywhere allows you to create a universe spanning multiple geographic regions.
For example, you can deploy a universe across Oregon (US-West) and South Carolina (US-East). Once deployed, you can connect to each node and perform a variety of tasks.
Create the universe
Before creating a universe, you need to configure a cloud provider, such as Google Cloud Provider (GCP). When done, use the YugabyteDB Anywhere UI to navigate to Universes, click Create Universe, and enter the following sample values:
-
In the Name field, enter helloworld2.
-
In the Provider field, select the cloud provider you configured.
-
Use the Regions field to enter Oregon and South Carolina.
-
In the Instance Type field, select n1-standard-8.
-
Provide any other desired settings.
-
Click Add Flags and add the
leader_failure_max_missed_heartbeat_periodsflag with the value of10for Master and T-Server. Note that since the data is globally replicated, RPC latencies are higher; this flag is used for increasing the failure detection interval in a higher RPC latency deployment.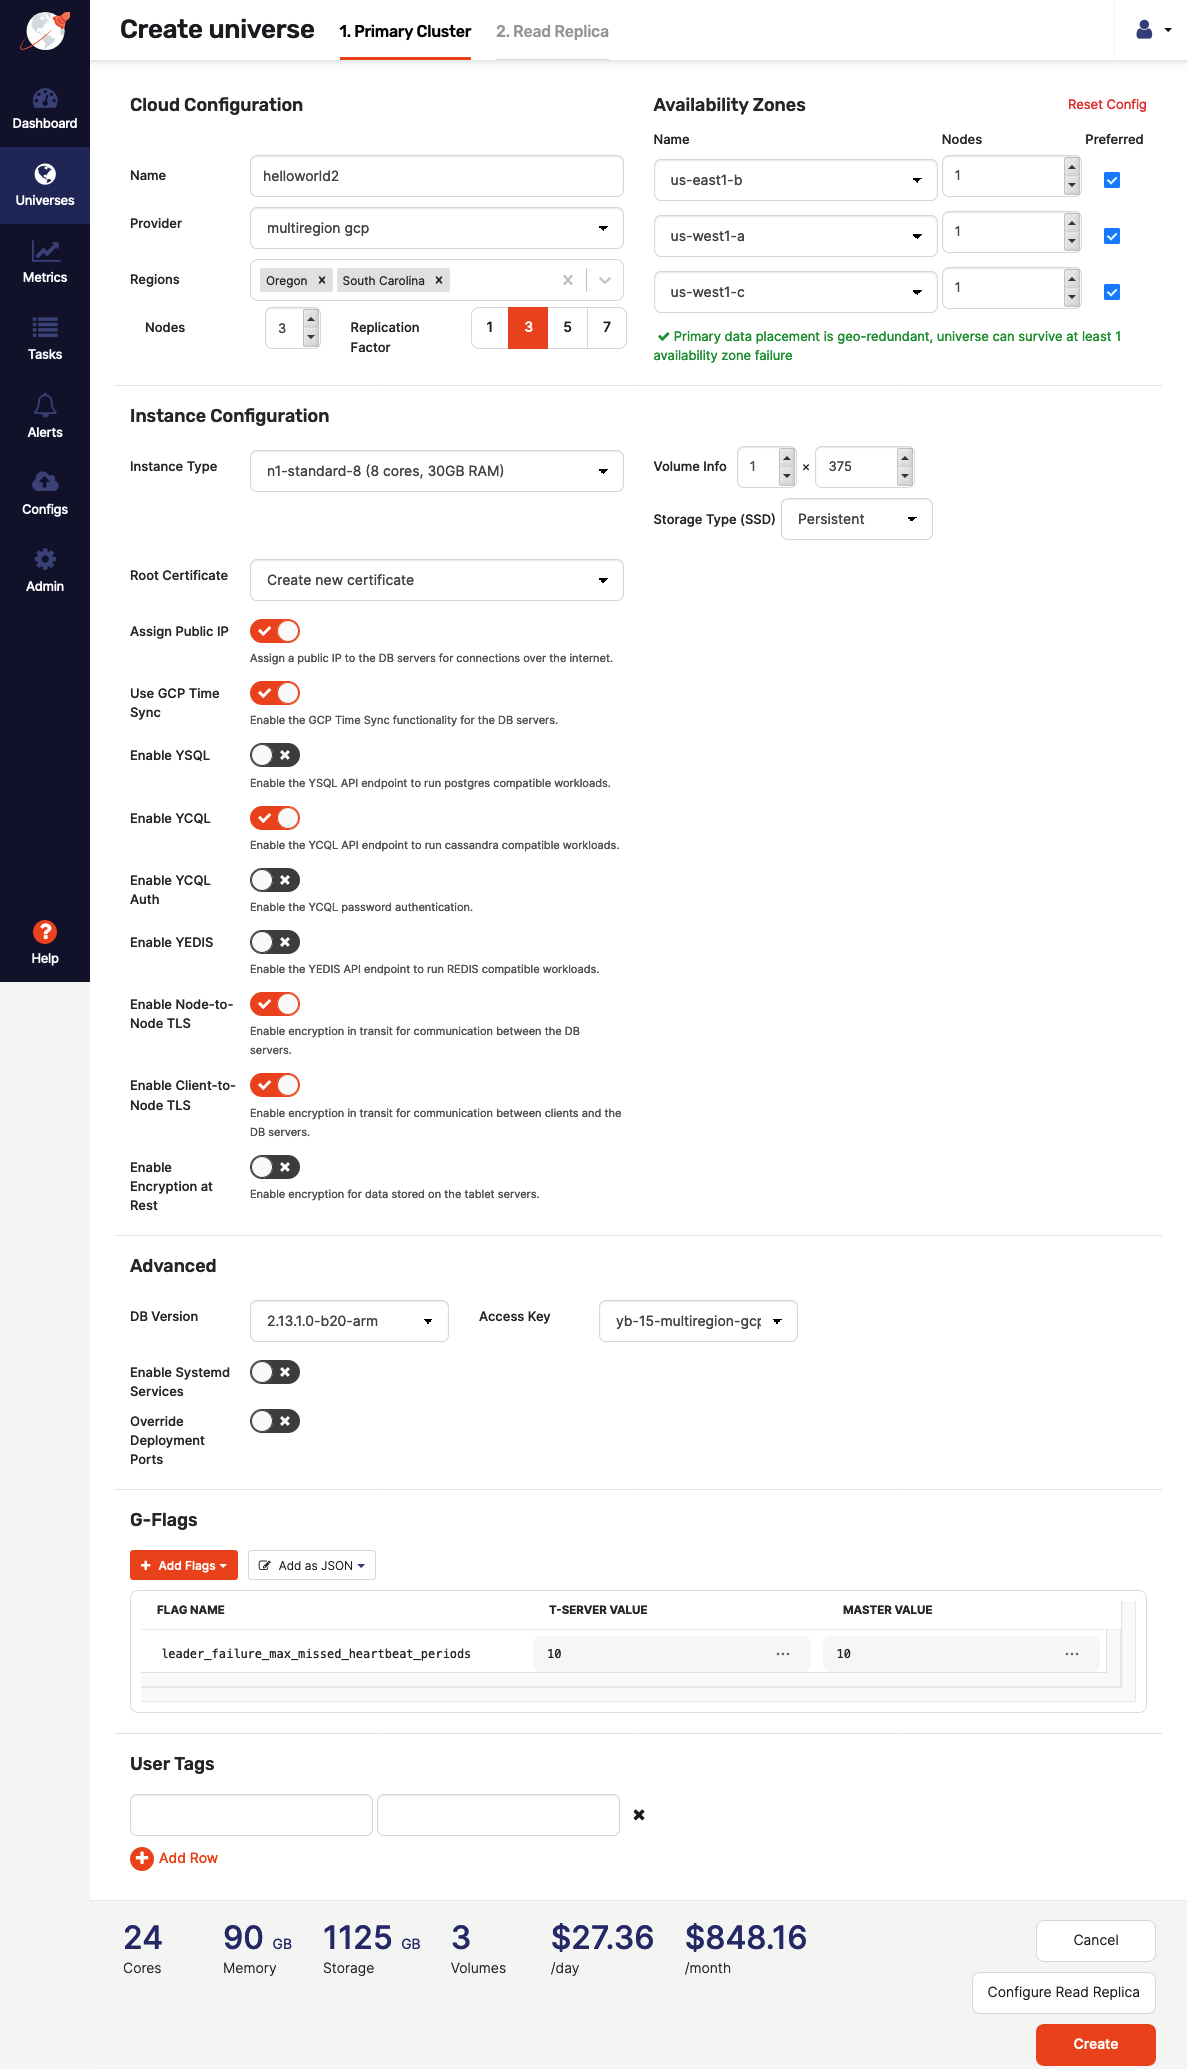
-
Click Create.
Examine the universe
When the universe is created, you can access it via Universes or Dashboard.
To see a list of nodes that belong to this universe, select Nodes. Notice that the nodes are distributed across geographic regions.
You can also verify that the instances were created in the appropriate regions by clicking on the node name to access the cloud provider's instances page. For GCP, you navigate to Compute Engine > VM Instances and search for instances that contain helloworld2 in their name.
Run a global application
Before you can run a workload, you need to connect to each node of your universe and perform the following:
- Run the
CassandraKeyValueworkload. - Write data with global consistency (higher latencies are expected).
- Read data from the local data center (low latency timeline consistent reads).
The first step is to navigate to Nodes, click Connect, and then use the Connect dialog to provide the required endpoints.
Connect to the nodes
You start by creating three Bash terminals. Then, for each node, click its corresponding Actions > Connect, copy the sudo command displayed in the Access your node dialog, and paste it into a Bash terminal.
With the goal of starting a workload from each node, perform the following on every terminal:
-
Install Java by executing the following command:
sudo yum install java-1.8.0-openjdk.x86_64 -y -
Switch to the
yugabyteuser by executing the following command:sudo su - yugabyte -
Export the
YCQL_ENDPOINTSenvironment variable (IP addresses for nodes in the cluster) by navigating to Nodes, clicking Connect, then using the Connect dialog to copy endpoints under the relevant category, and finally pasting this into a Shell variable on the database nodeyb-dev-helloworld2-n1to which you are connected, as per the following example:export YCQL_ENDPOINTS="10.138.0.3:9042,10.138.0.4:9042,10.138.0.5:9042"
Run the workload
Run the following command on each of the nodes, substituting REGION with the region code for each node:
$ java -jar /home/yugabyte/tserver/java/yb-sample-apps.jar \
            --workload CassandraKeyValue \
            --nodes $YCQL_ENDPOINTS \
            --num_threads_write 1 \
            --num_threads_read 32 \
            --num_unique_keys 10000000 \
            --local_reads \
            --with_local_dc <REGION>
You can find the region code of each node by navigating to Nodes and looking under the CLOUD INFO column: the first part before the slash indicates the region. For example, us-west1.
Check the performance
The application is expected to have the following characteristics based on its deployment configuration:
- Global consistency on writes, which would cause higher latencies in order to replicate data across multiple geographic regions.
- Low latency reads from the nearest data center, which offers timeline consistency (similar to asynchronous replication).
You can verify this by navigating to Metrics and checking the overall performance of the application.