Create a VPC Network
YugabyteDB Managed supports virtual private cloud (VPC) networks on AWS and GCP.
Using YugabyteDB Managed, you can create a VPC on AWS, deploy clusters in the VPC, and peer the VPC with application VPCs hosted on AWS.
To create a VPC network in AWS, you need to complete the following tasks:
| Task | Notes |
|---|---|
| Create the VPC | Reserves a range of IP addresses for the network. You need to create a VPC for each region in multi-region clusters. The status of the VPC is Active when done. |
| Deploy a cluster in the VPC | This can be done at any time - you don't need to wait until the VPC is peered. |
| Create a peering connection | Connects your VPC and the application VPC on the cloud provider network. The status of the peering connection is Pending when done. |
| Accept the peering request in AWS | Confirms the connection between your VPC and the application VPC. The status of the peering connection is Active when done. |
| Add the application VPC to the IP allow list | Allows the peered application VPC to connect to the cluster. Add at least one of the CIDR blocks associated with the peered application VPC to the IP allow list for your cluster. |
With the exception of accepting the peering request in AWS, these tasks are performed in YugabyteDB Managed.
For information on VPC network peering in AWS, refer to VPC Peering in the AWS documentation.
Create a VPC
To avoid cross-region data transfer costs, deploy your VPC in the same region as the application VPC you are peering with.
If you intend to deploy a multi-region cluster, you need to create a VPC for each region.
What you need
The CIDR range for the application VPC with which you want to peer, as the addresses can't overlap.Where to find it
Navigate to the AWS Your VPCs page for the region hosting the VPC you want to peer.
To create a VPC, do the following:
- On the Network Access page, select VPC Network, then VPCs.
- Click Create VPC to display the Create VPC sheet.
- Enter a name for the VPC.
- Choose the provider (AWS).
- Select the region. Typically, the same region that hosts the VPC with which you want to peer.
- Specify the CIDR address. Ensure the address does not overlap with that of the application VPC.
- Click Save.
YugabyteDB Managed adds the VPC to the VPCs list with a status of Creating. If successful, after a minute or two, the status will change to Active.
The VPC's network name and project ID are automatically assigned. You'll need these details when configuring the peering in GCP.
Deploy a cluster in the VPC
You can deploy your cluster in a VPC any time after the VPC is created. You must deploy the cluster in the VPC; the VPC can't be changed after cluster creation.
To deploy a cluster in a VPC:
- On the Clusters page, click Add Cluster.
- Choose Dedicated.
- Enter a name for the cluster, choose AWS, and click Next.
- For a Single-Region Deployment, choose the region where the VPC is deployed, and under Configure VPC, choose Deploy this cluster in a dedicated VPC, and select your VPC.
For a Multi-Region Deployment, specify a VPC for each region.
For more information on creating clusters, refer to Create a cluster.
Create a peering connection
After creating a VPC in YugabyteDB Managed that uses AWS, you can peer it with an AWS application VPC.
What you need
The following details for the AWS application VPC you are peering with:
- Account ID
- VPC ID
- VPC region
- VPC CIDR address
Where to find it
Navigate to your AWS Your VPCs page for the region hosting the VPC you want to peer.
To create a peering connection, in YugabyteDB Managed do the following:
- On the Network Access page, select VPC Network, then Peering Connections.
- Click Add Peering Connection to display the Create Peering sheet.
- Enter a name for the peering connection.
- Choose AWS.
- Choose the YugabyteDB Managed VPC you are peering. Only VPCs that use AWS are listed.
- Enter the AWS account ID, and the application VPC ID, region, and CIDR address.
- Click Initiate Peering.
The peering connection is created with a status of Pending.
Accept the peering request in AWS
To complete a Pending AWS peering connection, you need to sign in to AWS, accept the peering request, and add a routing table entry.
What you need
The CIDR address of the YugabyteDB Managed VPC you are peering with.Where to find it
The VPC Details sheet on the VPCs page or the Peering Details sheet on the Peering Connections page.
Sign in to your AWS account and navigate to the region hosting the VPC you want to peer.
DNS settings
Before accepting the request, ensure that the DNS hostnames and DNS resolution options are enabled for the application VPC. This ensures that the cluster's hostnames in standard connection strings automatically resolve to private instead of public IP addresses when the YugabyteDB Managed cluster is accessed from the application VPC.
To set DNS settings:
- On the AWS Your VPCs page, select the VPC in the list.
- Click Actions and choose Edit DNS hostnames or Edit DNS resolution.
- Enable the DNS hostnames or DNS resolution option and click Save changes.
Accept the peering request
To accept the peering request, do the following:
- On the AWS Peering Connections page, select the VPC in the list; its status is Pending request.
- Click Actions and choose Accept request to display the Accept VPC peering connection request window.
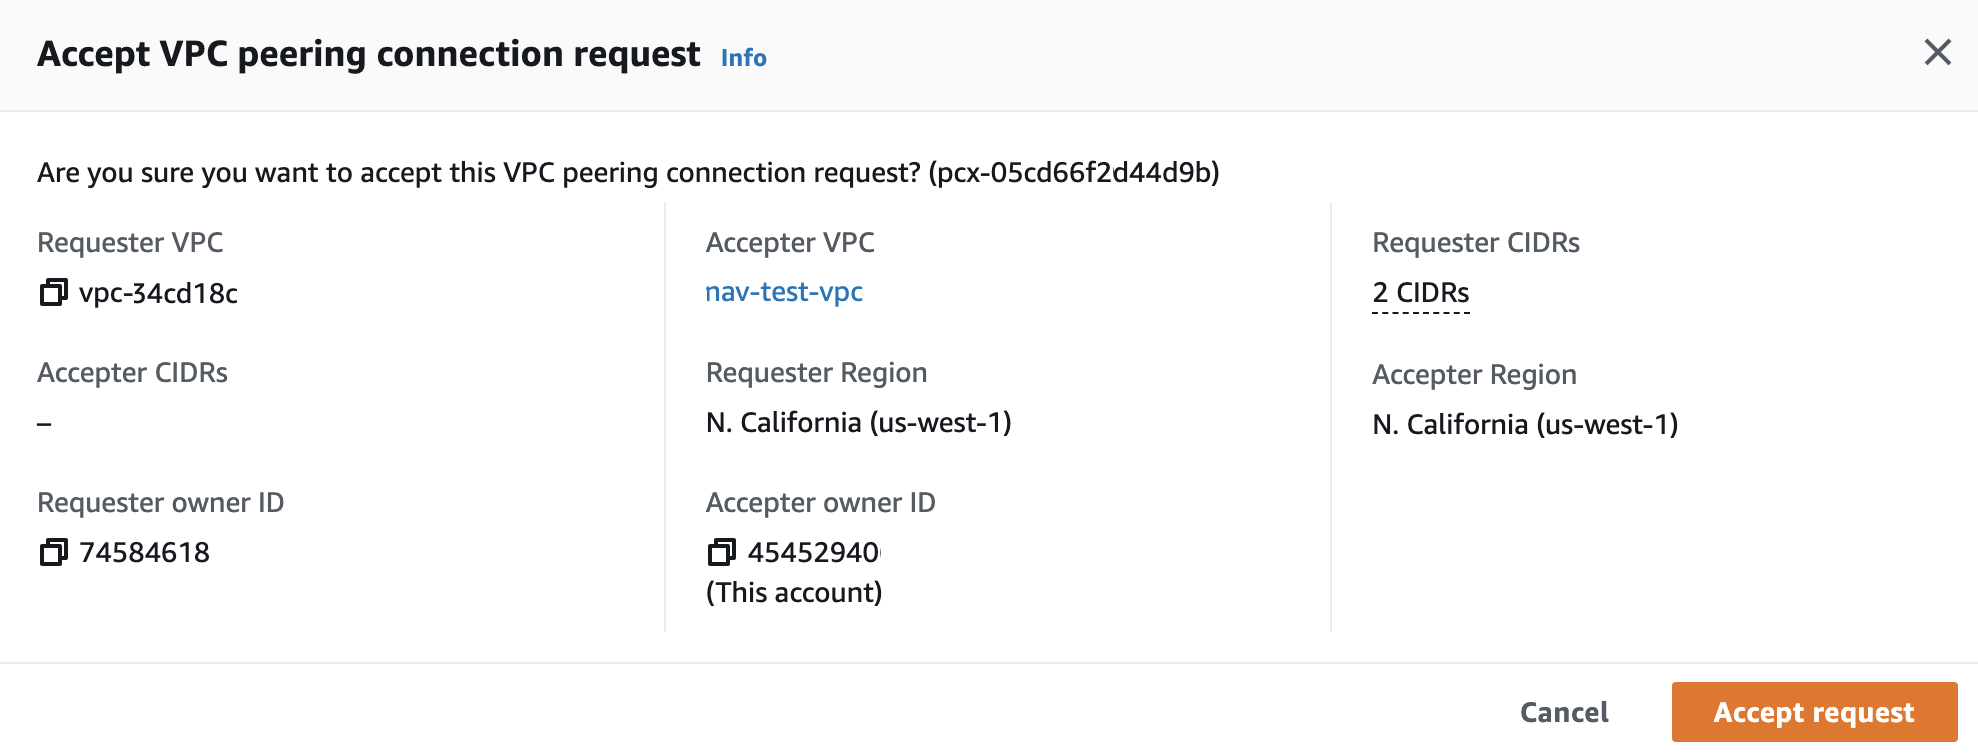
- Click Accept request.
On the Peering connections page, note the Peering connection ID; you will use it when adding the routing table entry.
Add the routing table entry
To add a routing table entry:
- On the AWS Route Tables page, select the route table associated with the VPC peer.
- Click Actions and choose Edit routes to display the Edit routes window.

- Click Add route.
- Add the YugabyteDB Managed VPC CIDR address to the Destination column, and the Peering connection ID to the Target column.
- Click Save changes.
When finished, the status of the peering connection in YugabyteDB Managed changes to Active if the connection is successful.
Add the application VPC to the cluster IP allow list
To enable the application VPC to connect to the cluster, you need to add the VPC to the cluster IP allow list.
What you need
The CIDR address for the AWS application VPC you are peering with.Where to find it
Navigate to the AWS Your VPCs page for the region hosting the VPC you want to peer.
To add the application VPC to the cluster IP allow list:
-
On the Clusters page, select the cluster you are peering, and click Add IP Allow List to display the Add IP Allow List sheet.
-
Click Create New List and Add to Cluster.
-
Enter a name and description for the list. For example, the name and details of your application VPC.
-
Add at least one of the CIDR blocks associated with the peered application VPC.
-
Click Save when done.
For more information on IP allow lists, refer to IP allow lists.